Travel photographer
A passerby crosses a quiet street scene and covers part of a repeating wall.
Check the restored bricks and pavement lines, not just the space where the person stood.
remove people from photosA magic eraser edit works best when you remove one clear distraction and leave enough surrounding detail to rebuild the background. Use this guide to choose an image, describe the edit, and judge whether the result looks natural.

Start with the original photo, not a screenshot or a heavily compressed copy. Check that you have permission to edit it, and keep the original so you can compare details later.
The object, its shadow, and the surface behind it all affect the result. These common situations call for different checks, even when the magic eraser goal sounds similar.
A passerby crosses a quiet street scene and covers part of a repeating wall.
Check the restored bricks and pavement lines, not just the space where the person stood.
remove people from photosAn unwanted sign sits behind a product photographed for a post.
Keep the product edge intact and inspect the surface that was behind the sign.
remove text from imageA marked reference image contains an element they would rather not show.
Confirm permission to use and alter the image before making an edit.
remove watermark from imageTo remove object from photo online free, begin with a single, well-defined object. Available tools and access terms vary, so check the destination before relying on a particular workflow.
Choose the clearest version you have. Look closely at the area behind the object: plain sky is easier to reconstruct convincingly than a face, a patterned fence, or a row of tiny letters.
Identify the object and mention details that should remain, such as straight horizon lines or natural shadows. If the available editor offers a selection brush, include the object's edges without sweeping across nearby subjects.
Compare the edited area with the original at a close view and at normal viewing size. Watch for duplicated textures, blurred borders, or a shadow that remains after its object is gone; revise the selection or try a different source image if needed.
A magic eraser cannot reveal the actual pixels hidden behind an object. It estimates a plausible replacement, which makes some scenes harder than others.
If an object blocks a person's face or a unique piece of architecture, the missing detail cannot be recovered reliably from that photo alone.
WorkaroundUse another photo of the scene as a reference, or leave the area unedited.
Tiles, railings, and printed designs make small breaks easy to spot, especially where the object crosses several lines.
WorkaroundEdit a smaller area at a time and compare each line with the original.
Removing an item while retaining its reflection or cast shadow can make an otherwise clean edit look wrong.
WorkaroundInspect the surrounding light and include the reflection or shadow when appropriate.
An online editor may limit exports, resolution, or access. This guide cannot establish what a linked service currently offers.
WorkaroundReview the destination's current terms and keep your original file.
A side-by-side view helps you catch changes to nearby objects. A successful magic eraser result should preserve the composition as well as remove the distraction.

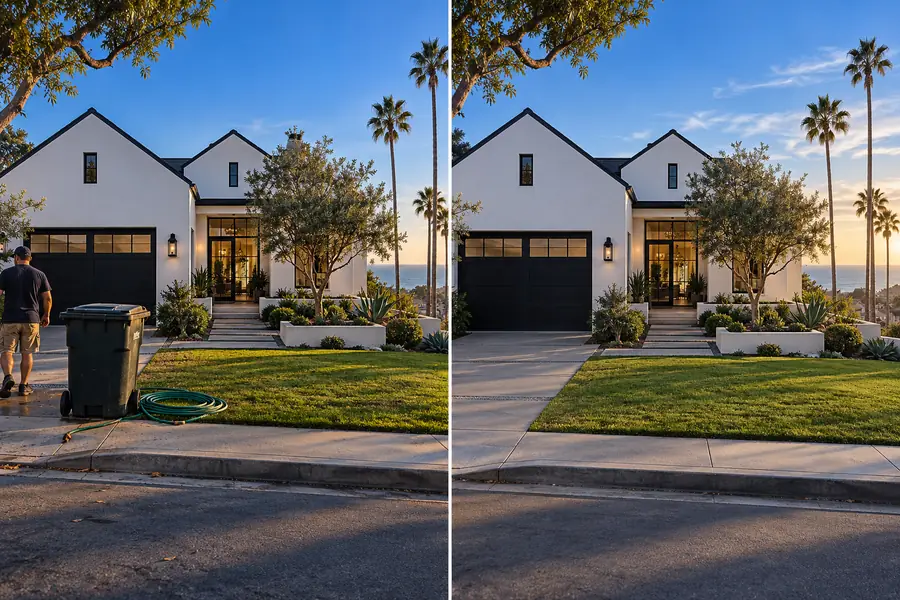
Compare cup edges, tabletop texture, and shadows; the pair illustrates what to inspect, not a guaranteed result from the linked service.
Decide whether the object is a good candidate for removal before opening an online editor. The comparison below is about image conditions, not promised magic eraser features.
Simpler removal
Plain wall or open sky
More demanding removal
Detailed mural or crowded scene
Simpler removal
Clear outline
More demanding removal
Hair, glass, or motion blur
Simpler removal
Small patch of repeating texture
More demanding removal
Large area of unique detail
Simpler removal
Soft, even illumination
More demanding removal
Strong shadows or reflections
Simpler removal
Space around the object
More demanding removal
Object overlaps a face or product
Simpler removal
Inspect the filled patch
More demanding removal
Inspect the patch and every crossed edge
Describe the object you want gone and the details you want to keep. Explore the available image tools, check their current access terms, and compare any edit with your original before sharing it.
Some online editors offer ways to start without an upfront charge, but availability, limits, and export terms can change. Check the service you open before assuming your particular edit or download is included.
Small, clearly outlined objects against simple backgrounds are usually easier to replace convincingly. A magic eraser edit becomes harder when the object covers a face, intricate pattern, or distinctive structure.
The replacement is an estimate of what might be behind the object, not a recovery of hidden pixels. Try a tighter selection if the editor permits it, then inspect nearby edges and patterns again.
Usually, if the shadow belongs only to the object you removed. Look for reflections and changes in lighting as well; leaving either behind can make the scene appear inconsistent.